 Subscribe with RSS Reader
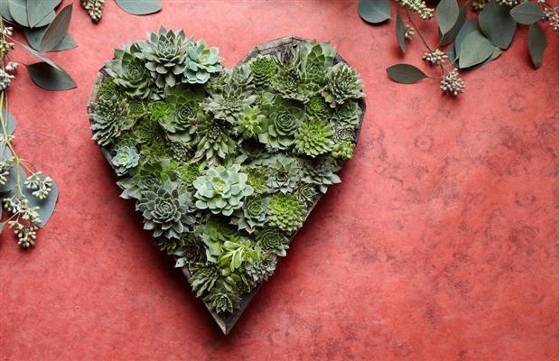
BY SARAH WOLFE, THE ASSOCIATED PRESS
Living pictures are made with cuttings of succulents woven together in everything from picture frames to pallet boxes.
Photograph by: Caitlin Atkinson , Flora Grubb Gardens
Looking for a fresh way to liven up your garden walls? Think plants, not paintings.
Living pictures -- cuttings of assorted succulents woven together in everything from picture frames to pallet boxes -- have caught on among garden designers and landscapers this spring as an easy, modern way to add colour and texture to an outdoor space.
"Living pictures composed of succulents have a gorgeous sculptural quality that work surprisingly well in a number of different esthetics -- contemporary, bohemian, Southwestern and more," says Irene Edwards, executive editor of Lonny home design magazine. "They're great for urban dwellers with limited space."
Living pictures are also nearly maintenance-free (that is to say, hard to kill). So even beginners or those without green thumbs can look like the master gardener of the neighbourhood. Here's how you can create your own living succulent picture:
PICK YOUR STYLE
There are a few ways you can go. For a larger living picture, you can use a wooden pallet, framing out the back like a shadow box. Large, do-it-yourself living wall panels are also for sale online through many garden shops.
But going big right away can be daunting, and bigger also means heavier, so many newbies like California gardening blogger Sarah Cornwall stick with smaller picture or poster frames.
Go vintage with an antique frame or finish, or build your own out of local barn wood. Chunky, streamlined frames like the ones Cornwall bought from Ikea give a more modern feel.
You'll also need a shadow box cut to fit the back of the frame, and wire mesh or "chicken wire" to fit over the front if you're going to make your own.
First, nail or screw the shadow box to the back of the frame. A depth of five to 7.5 centimetres is ideal. Set the wire mesh inside the frame and secure it with a staple gun, then nail a plywood backing to the back of the shadow box.
TAKE CUTTINGS
Almost any succulent can be used for living pictures, though it's usually best to stick with varieties that stay small, like echeverias and sempervivums, says DIG Gardens co-owner Cara Meyers.
"It's fun to use varieties of aeoniums and sedums for their fun colours and textures, but they may need a little more maintenance, as they may start to grow out of the picture more," she says.
Cut off small buds of the succulents for cuttings, leaving a stem of at least six millimetres long.
No succulents to snip? You can always buy some at a nursery, or trade with other gardeners in your neighbourhood.
"They grow so easily, don't feel embarrassed knocking on a door to ask for a few cuttings," Cornwall says.
Make sure any old, bottom leaves are removed, then leave the cuttings on a tray in a cool, shaded area for a few days to form a "scab" on the ends before planting.
ADD SOIL
Set the frame mesh-side up on a table and fill with soil, using your hands to push it through the wire mesh openings.
Be sure to use cactus soil, which is coarser than potting soil for better drainage.
Some vertical gardeners place a layer of sphagnum moss under and over the soil to hold moisture in when watering.
FILL IN WITH PLANTS
Now comes the fun and creative part.
Lay out the succulent cuttings in the design you want on a flat surface, and poke them into the wire mesh holes in your frame.
You can start either in one corner or by placing the "focal point" cuttings in first and filling in around them. Waves or rivers of colour are popular living-picture designs, although Cape Cod-based landscaper Jason Lambton has gone bolder with spirals of green and purple.
"We painted the pallet different colour stripes to go with the colour theme of the back of the house," says Lambton, host of HGTV's Going Yard. "It looked like a cool piece of living, reclaimed art."
Using just one type of succulent is also a simple yet elegant option, says Kirk Aoyagi, co-founder and vice-president of FormLA Landscaping.
"Collages with some draping and some upright plants can create a more dramatic look and feel," he says.
CARE AND MAINTENANCE TIPS
Keep the living picture flat and out of direct sunlight for one to two weeks to allow roots to form along the stems, then begin watering.
"If you hang it up right away or it rains a lot, that dirt will just pour right out.... I made that mistake once," Lambton says.
Mount your living art once the succulents are securely rooted, which can take four to eight weeks depending on climate.
After that, water every seven to 10 days by removing from the wall and laying it flat. Be sure to let the water drain before hanging your living picture back up, to avoid rotting.
Comments:
Post Your Comment: